SensorThings FROST Server
These are my notes on setting up a FROST Server on a spare Raspberry Pi 5, 8GB model.
No docker?
There are some nice instructions from FROST on how to deploy with Docker - especially docker compose is a very easy way to get up and running in a few minutes.
Unfortunately, the official postgis docker image doesn’t support arm64, so I decided to do things the old fashioned way by setting up Debian 13’s packaged versions of postgis, postgres and tomcat 11.
This results (re)learning how to setup Tomcat and gives us a dev server that’s a little bit easier to work with vs docker compose, since if I feel like doing some hacking, I can just SCP a .war file without having to build a docker image.
Installation
Of course, a production system should automate these steps or probably bite the bullet and just use kubernetes and containers
Database
Official docs: https://fraunhoferiosb.github.io/FROST-Server/deployment/postgresql.html
Install postgis + postgres
sudo apt install -y postgis
Create postgres database and user
# enter password for user when prompted
sudo -u postgres createuser frost -P

sudo -u postgres createdb frost --owner frost
Connect to database, enable postgis
Has to be done as database superuser:
sudo -u postgres psql frost
CREATE EXTENSION postgis;

-- optional - for UUIDs
CREATE EXTENSION "uuid-ossp";
-- check you see the extension listed
\dx
Should output
                                 List of installed extensions
   Name    | Version |   Schema   |                        Description
-----------+---------+------------+------------------------------------------------------------
 plpgsql   | 1.0     | pg_catalog | PL/pgSQL procedural language
 postgis   | 3.5.2   | public     | PostGIS geometry and geography spatial types and functions
 uuid-ossp | 1.1     | public     | generate universally unique identifiers (UUIDs)
(3 rows)
Frost Server
Official docs: https://fraunhoferiosb.github.io/FROST-Server/deployment/tomcat.html
Install tomcat
sudo apt install -y tomcat11
Download postgres + postgis database drivers
Note: Docs are linking to a postgres 42.2 and postgis 2.4 from 2020. Suggest using the latest, as above.
Postgres
- Go to https://mvnrepository.com/artifact/org.postgresql/postgresql and download the lastest database driver
.jarfile - Copy
.jarfile to/usr/share/tomcat11/lib/ - Double check
.jarfile is world readable
Example:
wget https://repo1.maven.org/maven2/org/postgresql/postgresql/42.7.8/postgresql-42.7.8.jar
cp postgresql-42.7.8.jar /usr/share/tomcat11/lib/
sudo cp postgresql-42.7.8.jar /usr/share/tomcat11/lib/
ls -l /usr/share/tomcat11/lib/
Postgis
Same as above, but download from https://mvnrepository.com/artifact/net.postgis/postgis-jdbc.
Version numbering has changed, I used 2025.1.1.
Configure database context
Now we edit /var/lib/tomcat11/conf/context.xml (not server.xml) and configure the database context. We will use the same name the manual uses for easy copy-pasting:
Whole file should look like this:
<Context>

    <!-- Default set of monitored resources. If one of these changes, the    -->
    <!-- web application will be reloaded.                                   -->
    <WatchedResource>WEB-INF/web.xml</WatchedResource>
    <WatchedResource>WEB-INF/tomcat-web.xml</WatchedResource>
    <WatchedResource>${catalina.base}/conf/web.xml</WatchedResource>

    <!-- Uncomment this to enable session persistence across Tomcat restarts -->
    <!--
    <Manager pathname="SESSIONS.ser" />
    -->
    <Resource
        name="jdbc/sensorThings" auth="Container"
        type="javax.sql.DataSource" driverClassName="org.postgresql.Driver"
        url="jdbc:postgresql://localhost:5432/frost"
        username="frost" password="somepassword"
        maxTotal="20" maxIdle="10" maxWaitMillis="-1"/>
</Context>
Configure FROST server with environment variables
The easiest way to configure FROST server is environment variables in the systemd service file. Docs on variables
To configure the database, I added an Environment line under the [Service] entry:
sudo vi /etc/systemd/system/multi-user.target.wants/tomcat11.service
# FROST server
Environment="persistence_db_jndi_datasource=jdbc/sensorThings"
Now restart tomcat, and make sure it still works:
sudo systemctl daemon-reload
sudo systemctl restart tomcat11
Frost webapp
Follow the instructions on github to obtain FROST server https://github.com/FraunhoferIOSB/FROST-Server.
In the README.md, follow the first link for FROST-Server.MQHTTP which is the all in one package the docs mention to maven central and download the latest .war file.
# eg
wget https://repo1.maven.org/maven2/de/fraunhofer/iosb/ilt/FROST-Server/FROST-Server.MQTTP/2.6.2/FROST-Server.MQTTP-2.6.2.war
Copy to /var/lib/tomcat11/webapps/:
sudo cp FROST-Server.MQTTP-2.6.2.war /var/lib/tomcat11/webapps/
A few seconds later, tomcat should deploy the webapp and you will see a directory created at /var/lib/tomcat11/webapps/FROST-Server.MQTTP-2.6.2
Check it works in your web browser (dont forget trailing slash), eg: http://lab-0.lab.asio:8080/FROST-Server.MQTTP-2.6.2/
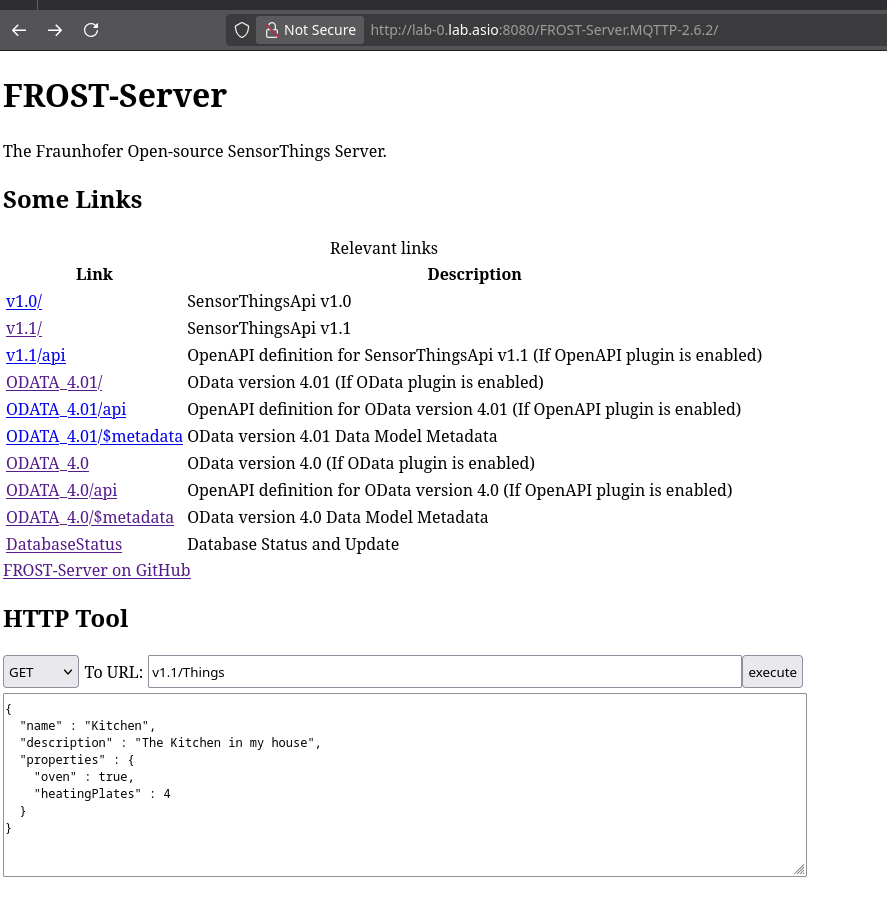
FROST database setup
Click DatabaseStatus on the main FROST page, it should look like this initially:
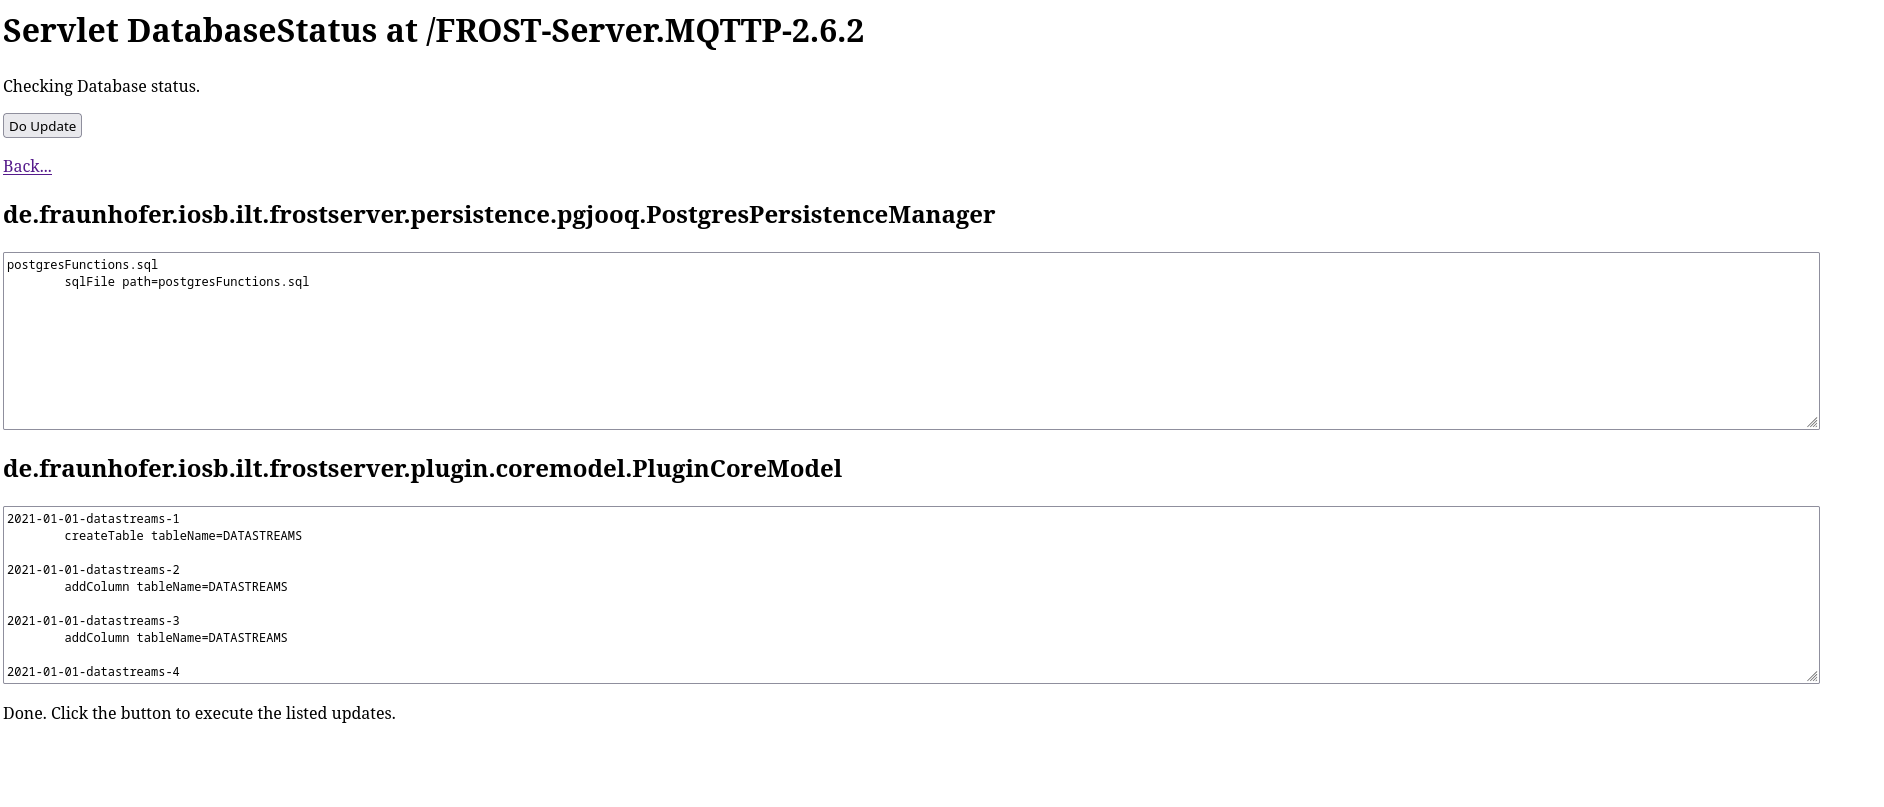
Click the Do Update button and the display should update:
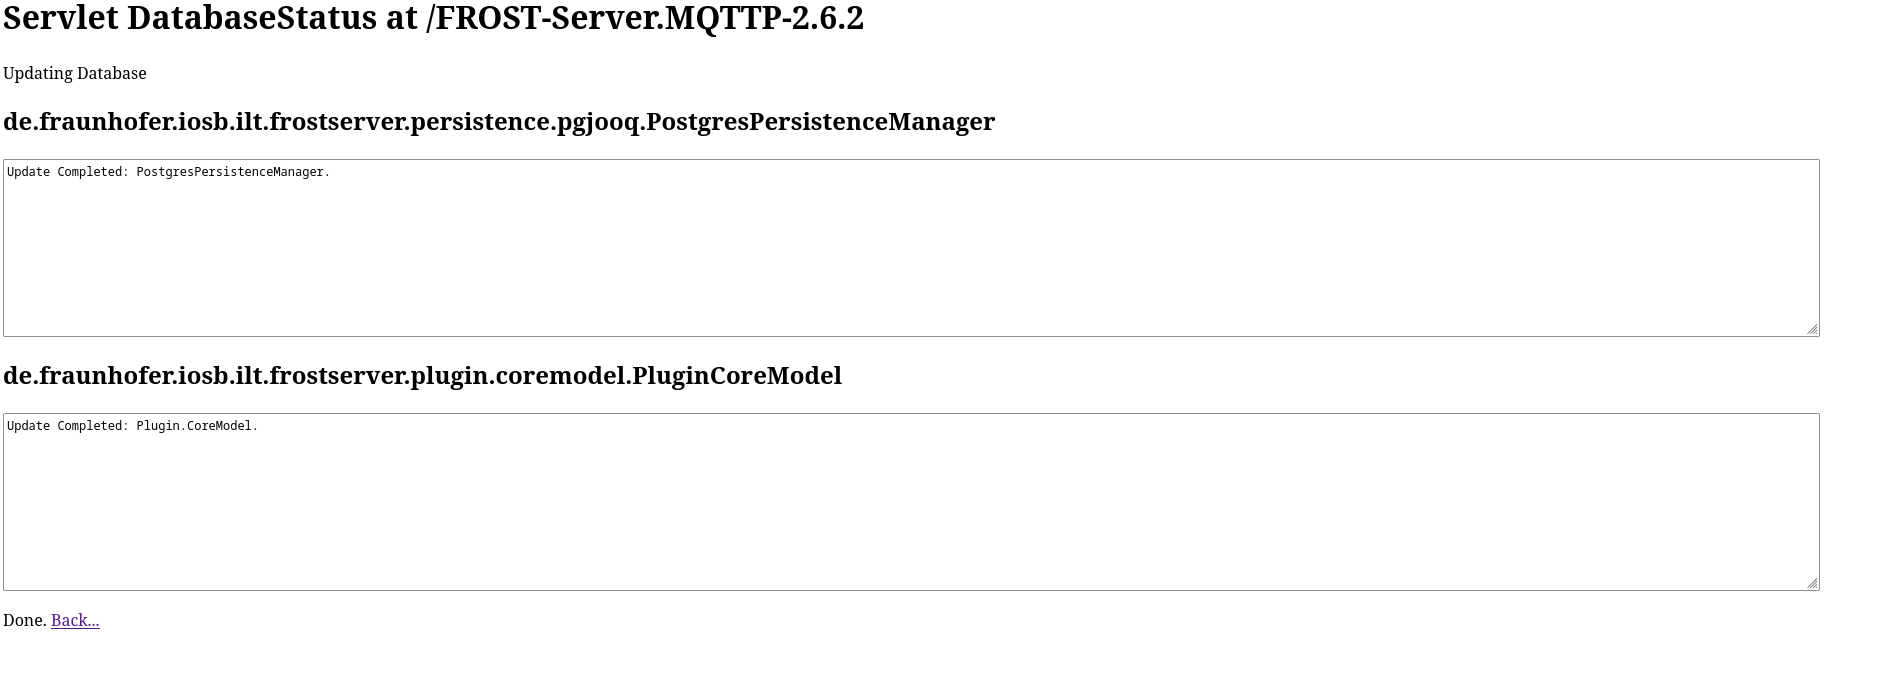
If it looks like this, the database is setup. You can check with the psql client by running \dt if you like. It should now list some tables.
If instead, you see an empty white box, then your JDBC connection is not working and will need troubleshooting.
Testing FROST
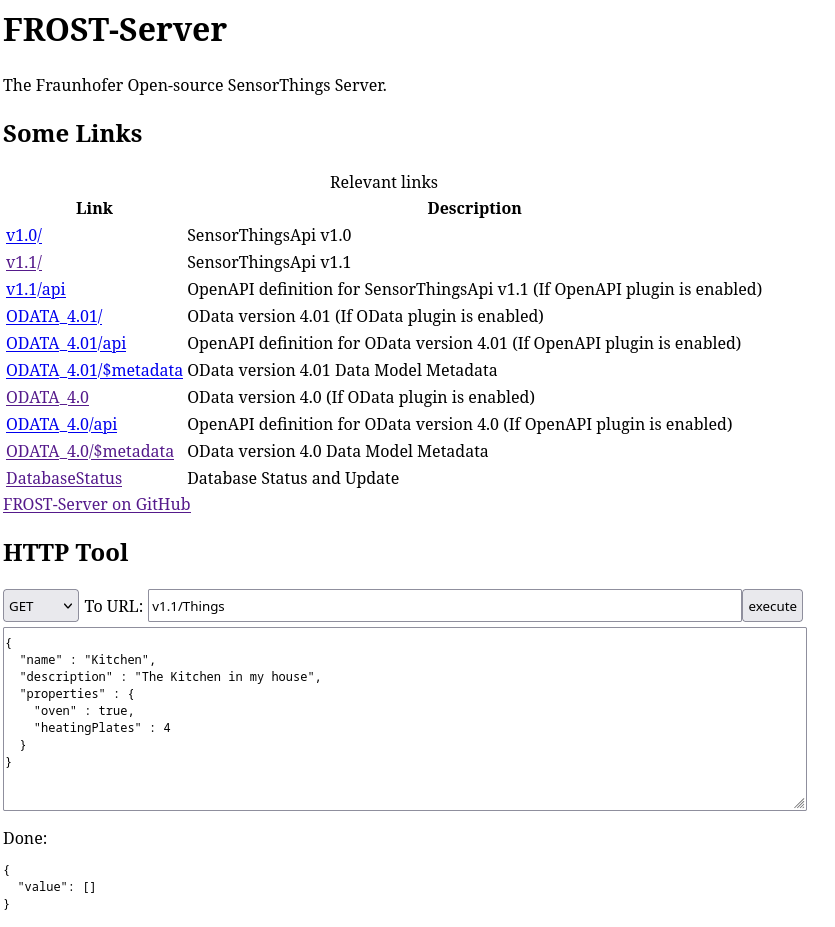
At this point you have a fully working, completely insecure FROST server. Nice!
Easiest test to do is click the Execute button at the bottom of the main FROST page. If it returns an empty JSON response under the Done heading, your server is working:
Securing FROST
Of course, the very next thing we should do is secure access to FROST. This is a complex area but my needs are basic:
- Read only access with no login - so I can share with the world
- Write/Admin operations protected by username and password
Auth docs are here.
We can configure these as Environment lines in our systemd Service just like we did for the JNDI connection. We will store our users in the same database as our sensor data for simplicity:
Environment="auth_db_jndi_datasource=jdbc/sensorThings"
Environment="auth_allowAnonymousRead=true"
Environment="auth_provider=de.fraunhofer.iosb.ilt.frostserver.auth.basic.BasicAuthProvider"
Environment="auth_autoUpdateDatabase=true"
After restarting FROST server:
sudo systemctl daemon-reload
sudo systemctl restart tomcat11
Click the execute button again to perform a test SensorThings lookup. It should still work, since we enabled anonymous access but there should be a short pause this time while the provider creates its database tables.
Login to the database again with psql and you should see a couple of new tables with \dt:
USERSUSERS_ROLES
Just like the manual says, this is a very simplistic table structure - providing the bare minimum of security for your DEV server:
frost=# select * from "USERS";
 USER_NAME | USER_PASS
-----------+-----------
 admin     | admin
 read      | read
 write     | write
(3 rows)
Generate a secure password with openssl, like this:
$ openssl rand -base64 34
xZSA3s6B4q73rpP70zxAqBzNJyqrgEqOJu1HK41rxUFt2Q==
And now update the passwords for admin and write, like this:
UPDATE "USERS" SET "USER_PASS" = 'PASTE PASSWORD HERE!' WHERE "USER_NAME" = 'write';
UPDATE "USERS" SET "USER_PASS" = 'PASTE PASSWORD HERE!' WHERE "USER_NAME" = 'admin';
Run the SELECT command again to make sure the passwords were changed properly, then restart tomcat again to make sure any old sessions were destroyed.
If you try to click DatabaseStatus it should now require the admin password you just set.
Making the server public
Now we have a secured, working server to share with the world. My goto solution for doing this over a home WIFI connection is CloudFlare Tunnel. CloudFlare has their own docs for setting up cloudflared and they are very good, so no need to repeat them here. Just follow the instructions if you want to make your server public, otherwise you can skip and just use locally or work out your own port forwarding.
After configuring the CloudFlare tunnel, you now also have:
- Public server instance
- Real HTTPS certificate, accepted everywhere
- Basic analytics
- Easy access to other CloudFlare features if you need them
Have lots of fun :)
Troubleshooting
Connect to database as frost user
psql --user frost --host localhost -p 5432 frost
Reading FROST logs
Logs are under /var/log/tomcat11 or use sudo journalctl -u tomcat11
JNDI not working
- Make sure you edited
/var/lib/tomcat11/conf/context.xmland not (the identical - before you started editing…)/usr/share/tomcat11/etc/context.xml– this is to do withCATALINA_HOMEvsCATALINA_BASE- IYKYK. - If you are old school, don’t be tempted to edit
server.xmland use<ResourceLink>- the manual says it doesn’t work that way any more (see next point) - RTFM
If all else fails and you want to test if the JDNI lookup is working, copy paste the following into /var/lib/tomcat11/webapps/ROOT/expletive_of_your_choice.jsp and access from your browser:
<%@ page import="javax.naming.InitialContext, javax.sql.DataSource, java.sql.Connection, java.io.PrintWriter" %>
<%
try {
    InitialContext ctx = new InitialContext();
    DataSource ds = (DataSource) ctx.lookup("java:/comp/env/jdbc/sensorThings");
    Connection conn = ds.getConnection();
    out.println("DS OK: " + conn.getMetaData().getURL());
    conn.close();
} catch (Exception e) {
    PrintWriter pw = new PrintWriter(out);
    e.printStackTrace(pw);
    pw.flush();
}
%>
ERROR: type “geometry” does not exist
On the DatabaseStatus page means you forgot to enable postgis for your database. Run the CREATE EXTENSION above.